We always say how much we love how our home looks for the holidays and are always sad to take all the decorations down when the season ends. The Christmas decor is so beautiful, cheerful and cozy. It’s nice to look at and the kids delight in it. The lights, the glitter, the ribbon, the beautiful ornaments and other accents are so charming and make the holidays even more special.
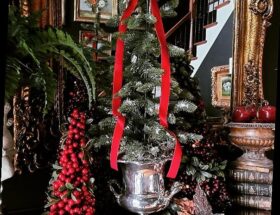
We put four trees up in our home every year. Yes, you heard me. Four trees! One grand tree in the foyer, one in the living room and a small tree in each one of our boys’ rooms!
I believe most of us are already experts in the field of Christmas tree decorating, especially since many of us have been doing this since childhood. Every year we carry out this tradition, and without even thinking, we go through the motions and voila the tree has been put up!
The Christmas tree is a staple item found in almost every home around the world during the holidays. You even see them in stores, restaurants, businesses, hair salons, etc. They are virtually everywhere around Christmas. You see it every year and they range from the adorable Charlie Brown Christmas Tree to the over-the-top tree in the Rockefeller Center.

The Christmas trees vary, but what actually sets them apart is the way they are decorated. If you want your tree to wow your guests this year and appear to be taken right out of the Macy’s or Bloomingdale’s department stores then it sounds like you are going for the professionally decorated look. Let’s do it!
Below are some step-by-step instructions on how to accomplish a professionally decorated Christmas tree:
Step 1 – Style: Nail down the style or look you want. Do you want it to appear high-end or elegant? Fun and cheerful? Have a theme perhaps? Vintage? Whimsical? Exotic? Dramatic? Look at Pinterest images for inspiration, home décor stores, and even take a stroll through a local garden center or an interior design wholesale shop. Garden centers and interior design wholesale shops are known to go all out just after Halloween and deck out numerous trees for display!
Display at local garden center. Stunning!
Step 2 – Supplies for Tree: Once you decided on the style you want it is time to gather all the supplies!
*The tree! This is the most important item! Your tree is your canvas, whether it is real or artificial, big or small, tall or short, colored or green, etc. Choosing your tree may be a short trip into your attic or garage or a drive up north to a Christmas tree farm. Make sure to bring your saw. Ha ha.
*Trimmings and tree skirt: Depending on the style you want gather all the trimmings you need to decorate your tree. Ribbons, ornaments, flowers, floral stems, branches, decorative accents/sticks, feathers, bows, something grand for the top, a tree skirt, etc.
Gathering these items may involve you going into your attic or storage space for things you already have, shopping online, visiting home décor or craft supplies stores, purchasing items from garden centers and even checking out what is offered at interior design wholesalers. In my frequent visits to estate sales, I’ve often seen beautiful, high-quality Christmas décor being sold.

*Tip: Some of these items can be quite expensive, therefore I recommend gathering supplies after the holidays when items are marked down. Of course, this involves planning a year ahead, but it will save you a lot of money. Also, like I mentioned above, check out estate sales in wealthier areas.
*Lights: For a more formal, traditional or elegant tree, white lights are recommended. Soft white is easier on the eyes and gives off a warm glow. Bright white or LED lights do the opposite as they give off a cooler radiance, but it can look great if you are going for a more contemporary look. Colored lights are less formal and are recommended for more fun and childlike trees.
Step 3 – Set Up Supplies: Once you have all the fun stuff! Your tree, the trimmings, the skirt and the lights! It is time to make sure you are geared up properly to create a Christmas masterpiece!
*Ladder – Depending on the height of tree, a ladder or secure stepping stool is recommended. Even, my tall, Dutch Husband uses a ladder when decorating our tree!
*Zip ties, scissors and wire snips, florist tape and wire, pipe cleaners, ornament hooks, etc. to ensure all the trimmings can be secured to the tree branches properly.

Step 4 – Prep for Set up: Once you have your tree and all the supplies listed above ensure the tree is ready to be decorated! That means it is cleaned/dusted, properly watered if real, placed securely on the tree stand, if pre-lit, ensure all the lights function and all the branches are fluffed out and not matted down. For artificial trees, prior to adding lights, ensure to fluff out branches in the direction they are intended. This step makes for a more realistic look.
If your tree is not pre-lit ensure the lights you want to use work and also make sure you have enough lights for the size of your tree. “Oops, we ran out of lights!”, is not a phrase you want to hear when you are ready to decorate the tree!
Tip: One strand per one foot, so if you have an eight-foot-tall tree you would need eight strands of lights.
Step 5 – Set up Time: If your tree is not pre-lit and you need to add lights, make sure the tree is pulled away from the wall first. This will allow you to walk around the tree, so you can add lights around the entire tree easily. Start at the bottom of the tree, pushing the lights in and out on the branches as you walk around the tree. Pushing the lights inward gives the tree more definition because the glow of the lights will also come from within versus only the glow coming from just the edge or perimeter of the tree. This method illuminates the whole tree, not just the outside. You’ll notice with pre-lit trees the lights tend to also be located in the center to give off this effect.

If you decorate with ribbons cascading down the tree like a waterfall, do this step after the lights before you decorate anything else. If you are not doing this step, then start at the top after the lights are put on the tree.
For the trimmings, always start at the top! This is where the ladder comes in handy! The top of the tree is considered the crown jewel! So why not start there?! Are you planning to place an angel on the top? A star? A large bow? A large flower? A crown? The sky is the limit here.
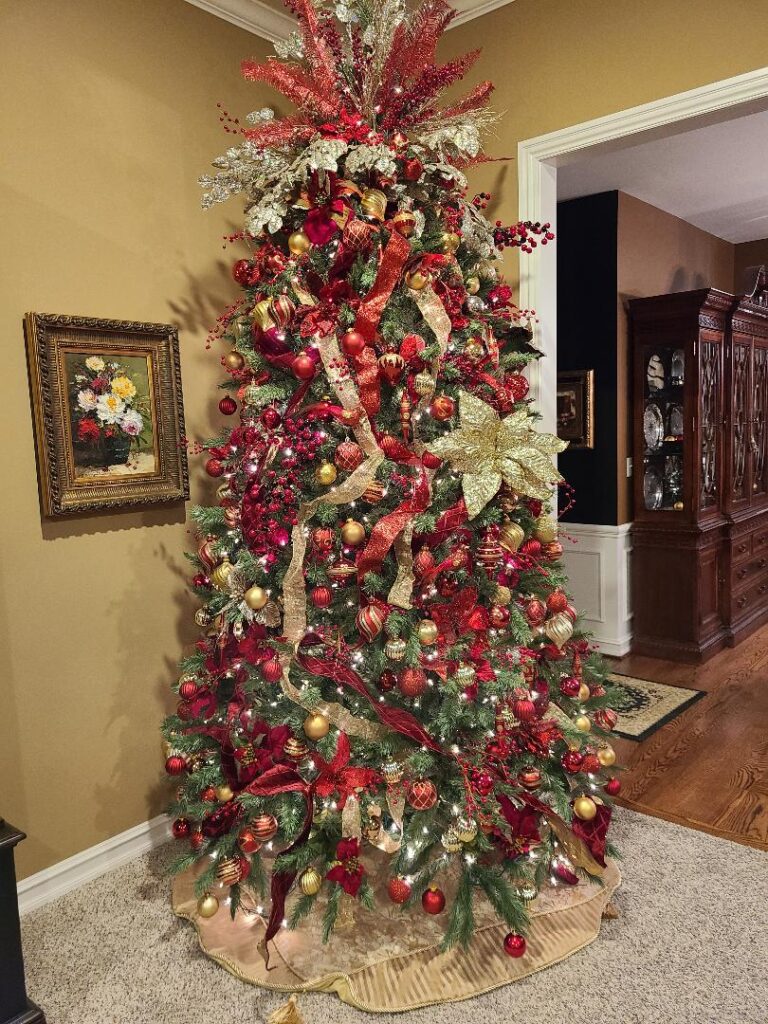
Living room tree. Lots of drama on top!
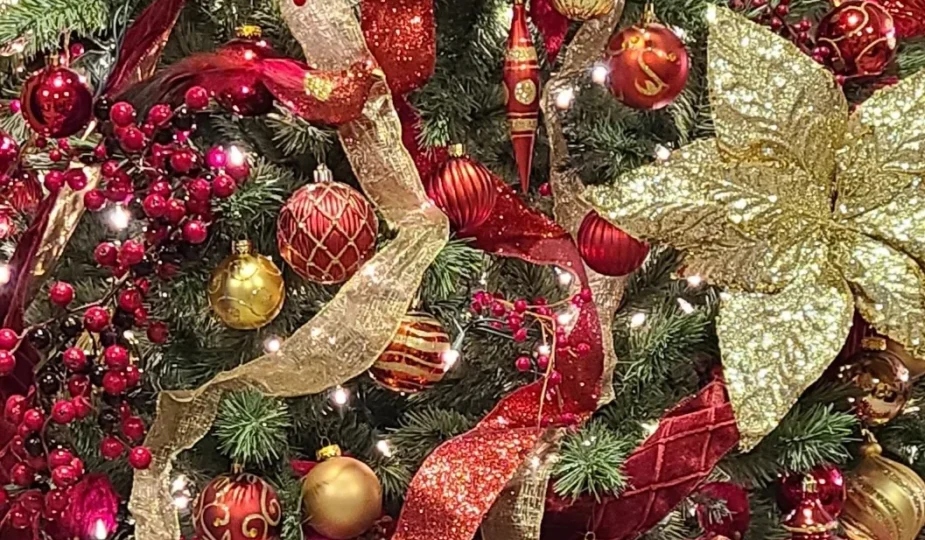
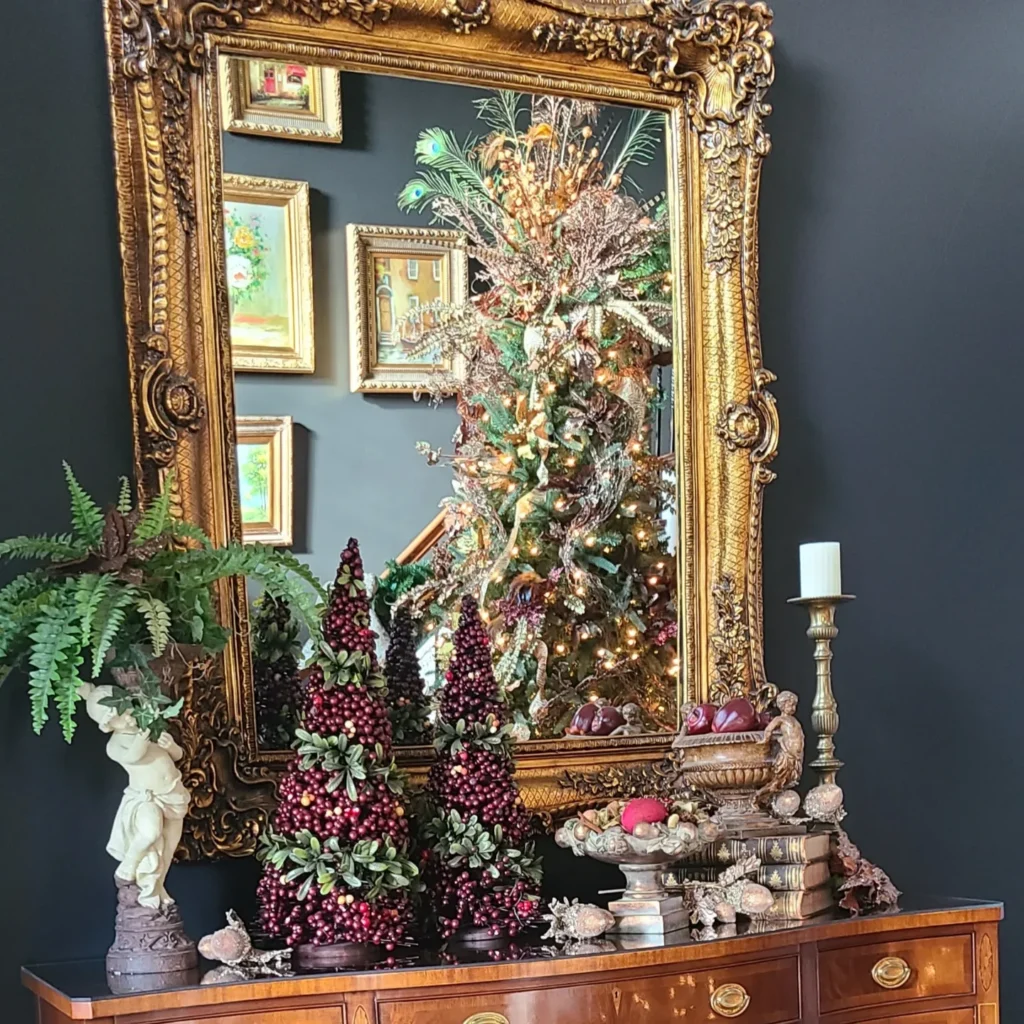
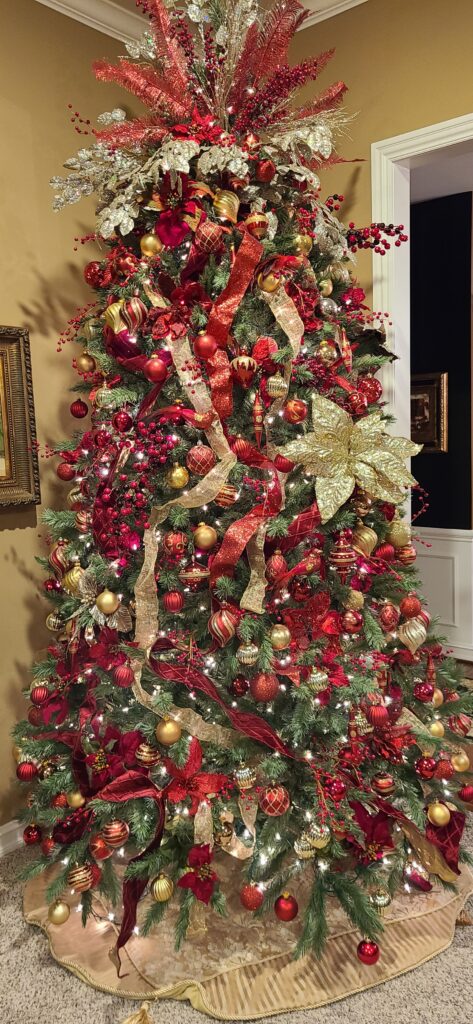
For our living room tree, we do not use a typical topper, instead we add various decorative stems to create big drama on the top. We create a peacock tail like explosion of glitter stems, branches, berries, ribbons, etc. For foyer tree, we do the same, but we add various feathers to keep things dramatic and interesting. The foyer tree is more exotic, so we use peacock and pheasant feathers. Tip: Keep the heavy drama on top. This is what will make your tree look very professional and high end.
Next, add filler type items to the tree. Examples, flowers, branches, decorative sticks, or other accents. No ornaments yet, but filler items to make the tree look full. Ensure areas between the branches look filled in to give a complete look.

For our living room tree, we use various poinsettias, red Christmas berries, decorative sticks, stems and glittery birds with feathers. This creates a lot of definition to the tree because various textures are used.
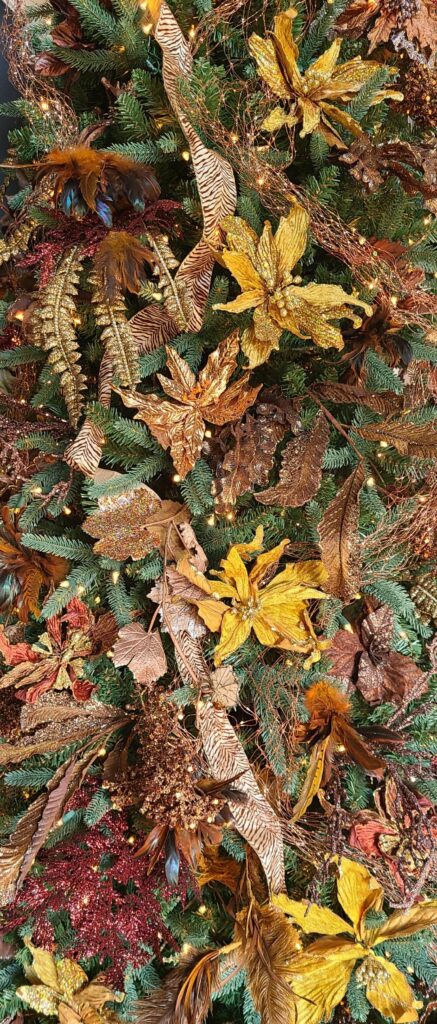
The foyer tree is more exotic so we have various feathers, glittery netting, leopard print ribbon, and lots of browns and copper tones. We do not use ornaments on this tree, it is all filler items.
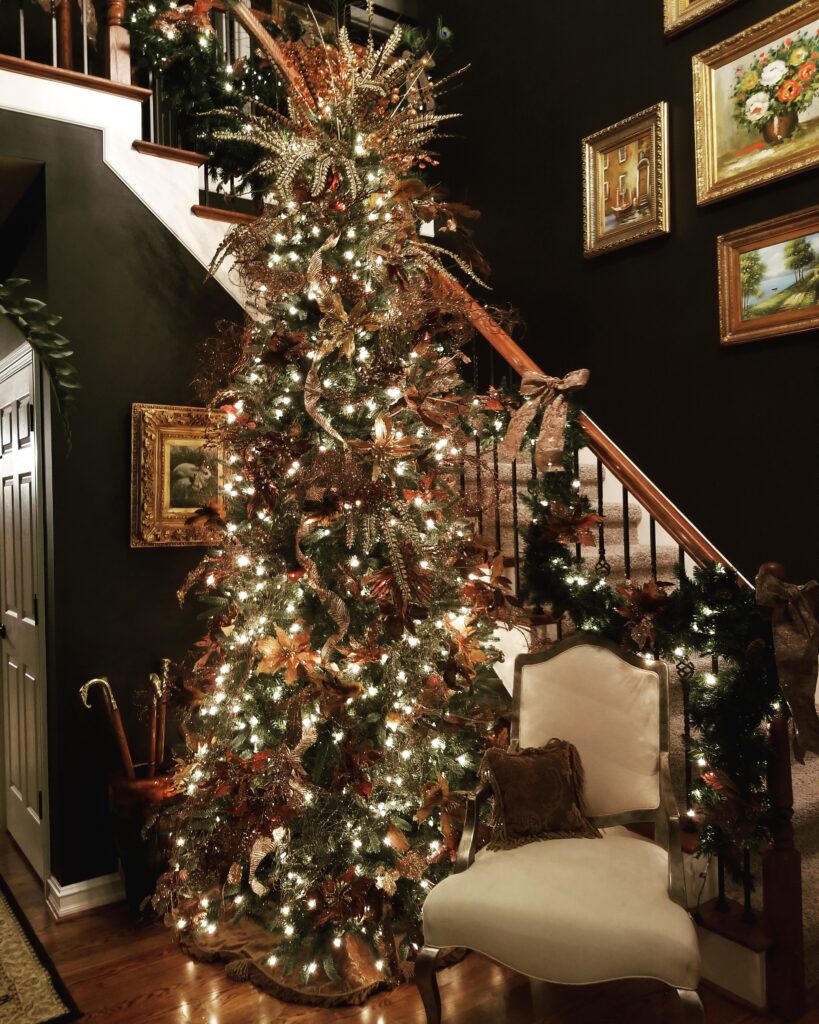
Foyer Tree! See the peacock feathers on top?
If you wish to add ornaments, do this after all the filler items are put on the tree. Walk around the tree and work to cover all areas. Stand back periodically to look at the entire tree, this helps to locate sparse areas. It is common for people to not decorate the side of the tree that will be facing the wall, but in order to achieve the professional look, and make the tree look fuller, you should add some filler items to the back side. This also contributes to the full look.

Lastly, crawl under the tree and put on your tree skirt. We always do this last because if you do it first, it may be covered in glitter, needles, sequins, etc.
Stand back and admire the work of art you created!
Enjoy!
Happy Holidays!