Halloween is right around the corner! Are you hosting a Halloween party? Are you invited to a Halloween gathering and want to bring something that will wow family and friends? Or maybe the kids are bored and want to do something out of the ordinary to express their love for the spooky season.
In the past, when such occasions arose, I either created a fall themed board or a generic Halloween charcuterie board. This year I wanted to do something different, something unique. I thought a pumpkin charcuterie board would elevate the snacking experience this Halloween!
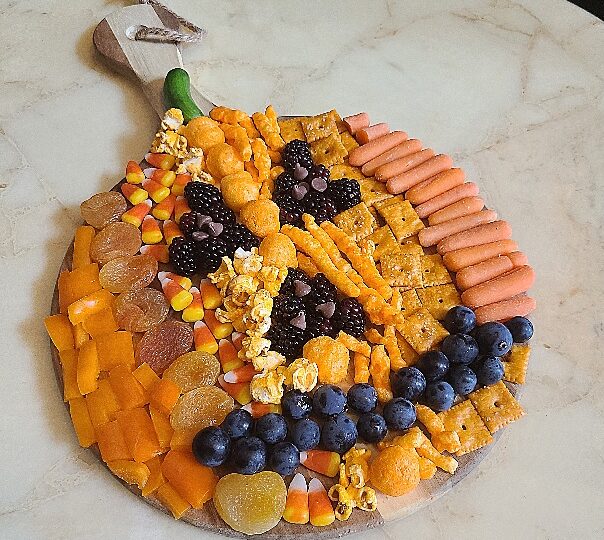
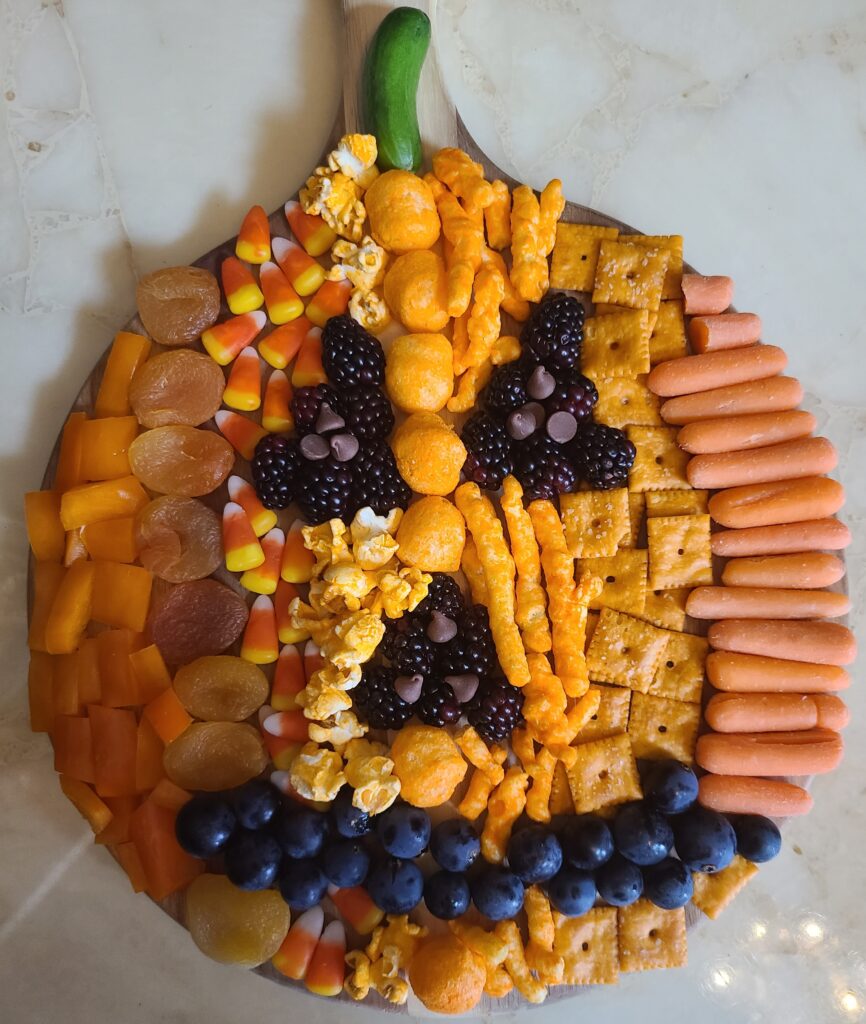
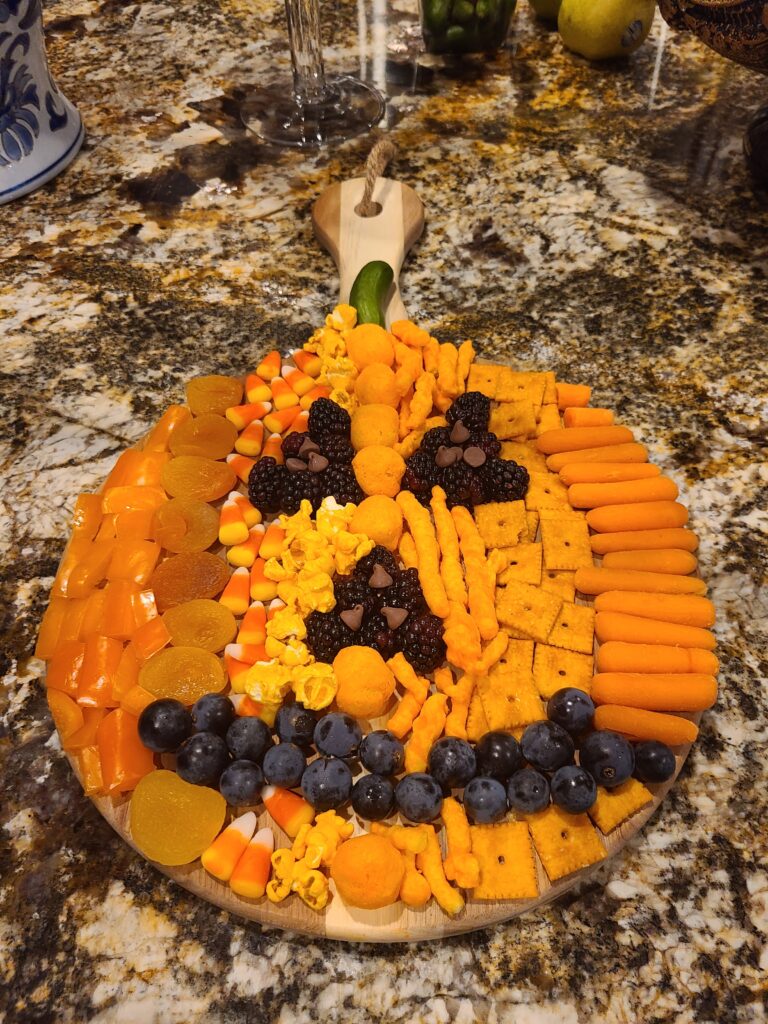
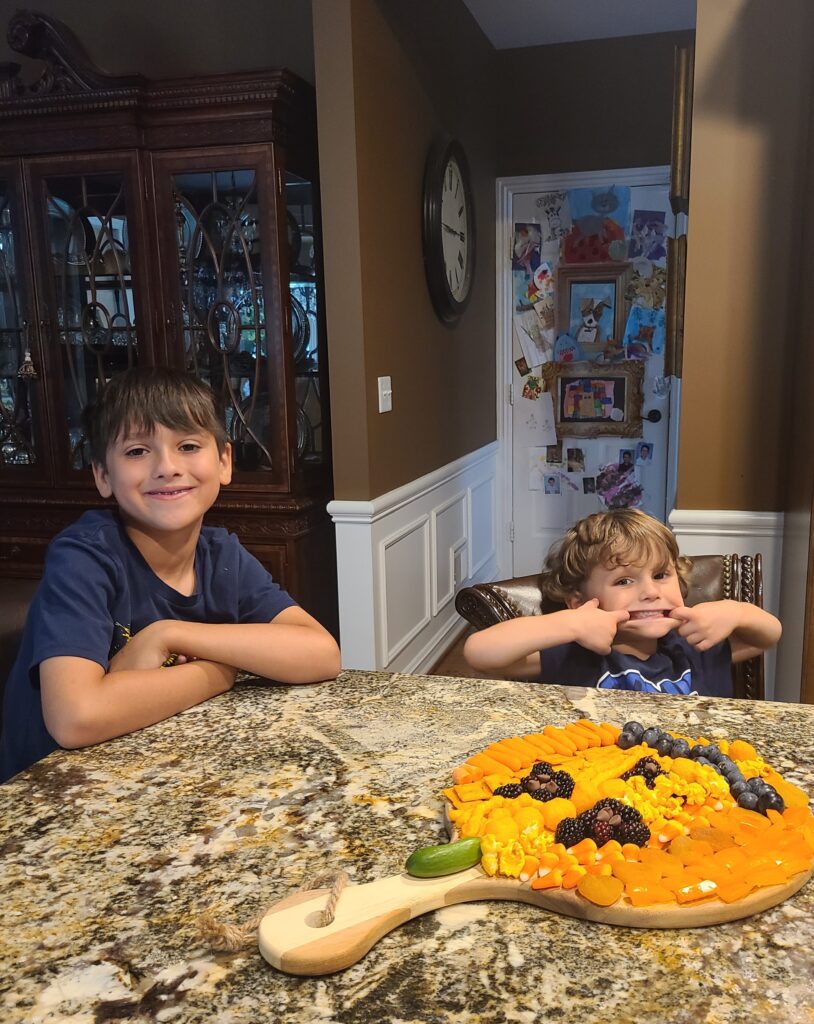
My boys and I wanted to give’em pumpkin to talk about, so we set out to make an adorable pumpkin charcuterie board. It turned out spooktacular! It was super fun to make, and the goodies were delicious!
If you want to step up your game this Halloween and create a jack-o’-lantern inspired charcuterie board, below are the steps for success:
*First: Find Your Canvas: Look through your kitchen cabinets for something to use. Think round. It can be a cutting board, a platter, or a large plate. To make things easier we used a round wooden cutting board with a handle because it already took on the pumpkin shape. Using a round canvas is not necessary but may make the process easier.
*Second: Create a Shopping List and Gather Supplies: To garner some inspiration check out Pinterest or Google images for pictures of jack-o’-lantern platters. I always recommend finding an image as reference to assist you in whatever you are creating. Think orange and black snacks. There is no right or wrong way to do this, do what inspires you.
Below is a list of items we used to create our pumpkin charcuterie board:
- Cheez-Its for the orange part
- Cheese balls for the orange part
- Cheese popcorn for the orange part
- Crunchy cheetos for the orange part
- Candy corn for the orange part
- Dried apricots for the orange part
- Orange pepper for the orange part
- Baby carrots for the orange part
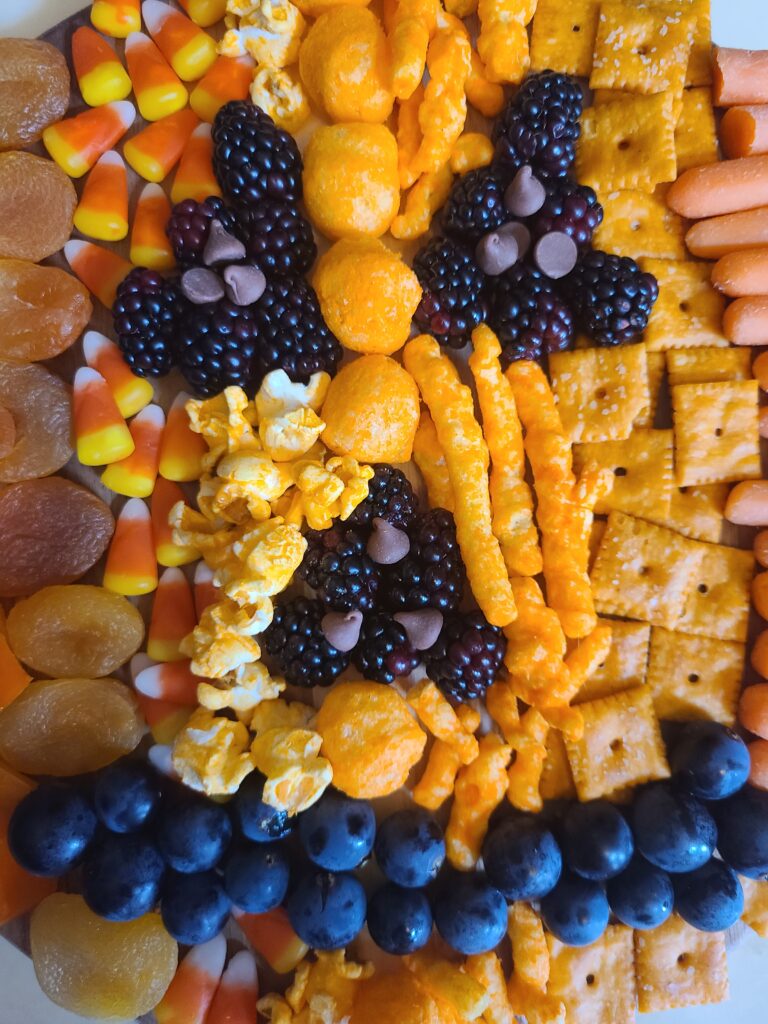
- Blackberries for the eyes
- Chocolate chips for the eyes
- Concord grapes for the mouth
- Mini cucumber for the stem
- Round cutting board – https://amzn.to/4h6IGFw
The above list is provided as a helpful guide, but when it comes to creating a cute pumpkin charcuterie board, there are so many options out there. You could use Doritos, blue corn chips, cheese crackers, black olives, cheese, goldfish crackers, oranges, nuts, etc. The sky is the limit here.
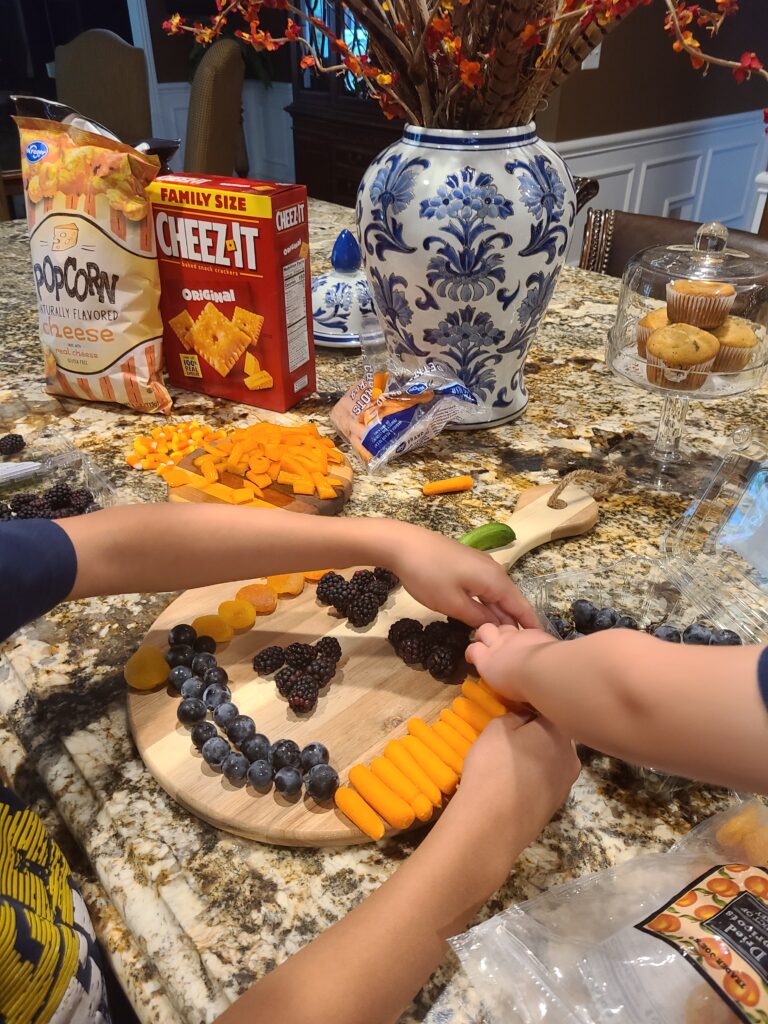
*Third: Prep and Assembly: Once you have the canvas and the spooky supplies, it is time to assemble. This is the fun part! Before you officially start assembling your pumpkin ensure you have any items prepped in advance. Meaning, wash, cut, dice, and peel as necessary. This part is all dependent on what goodies you are using.
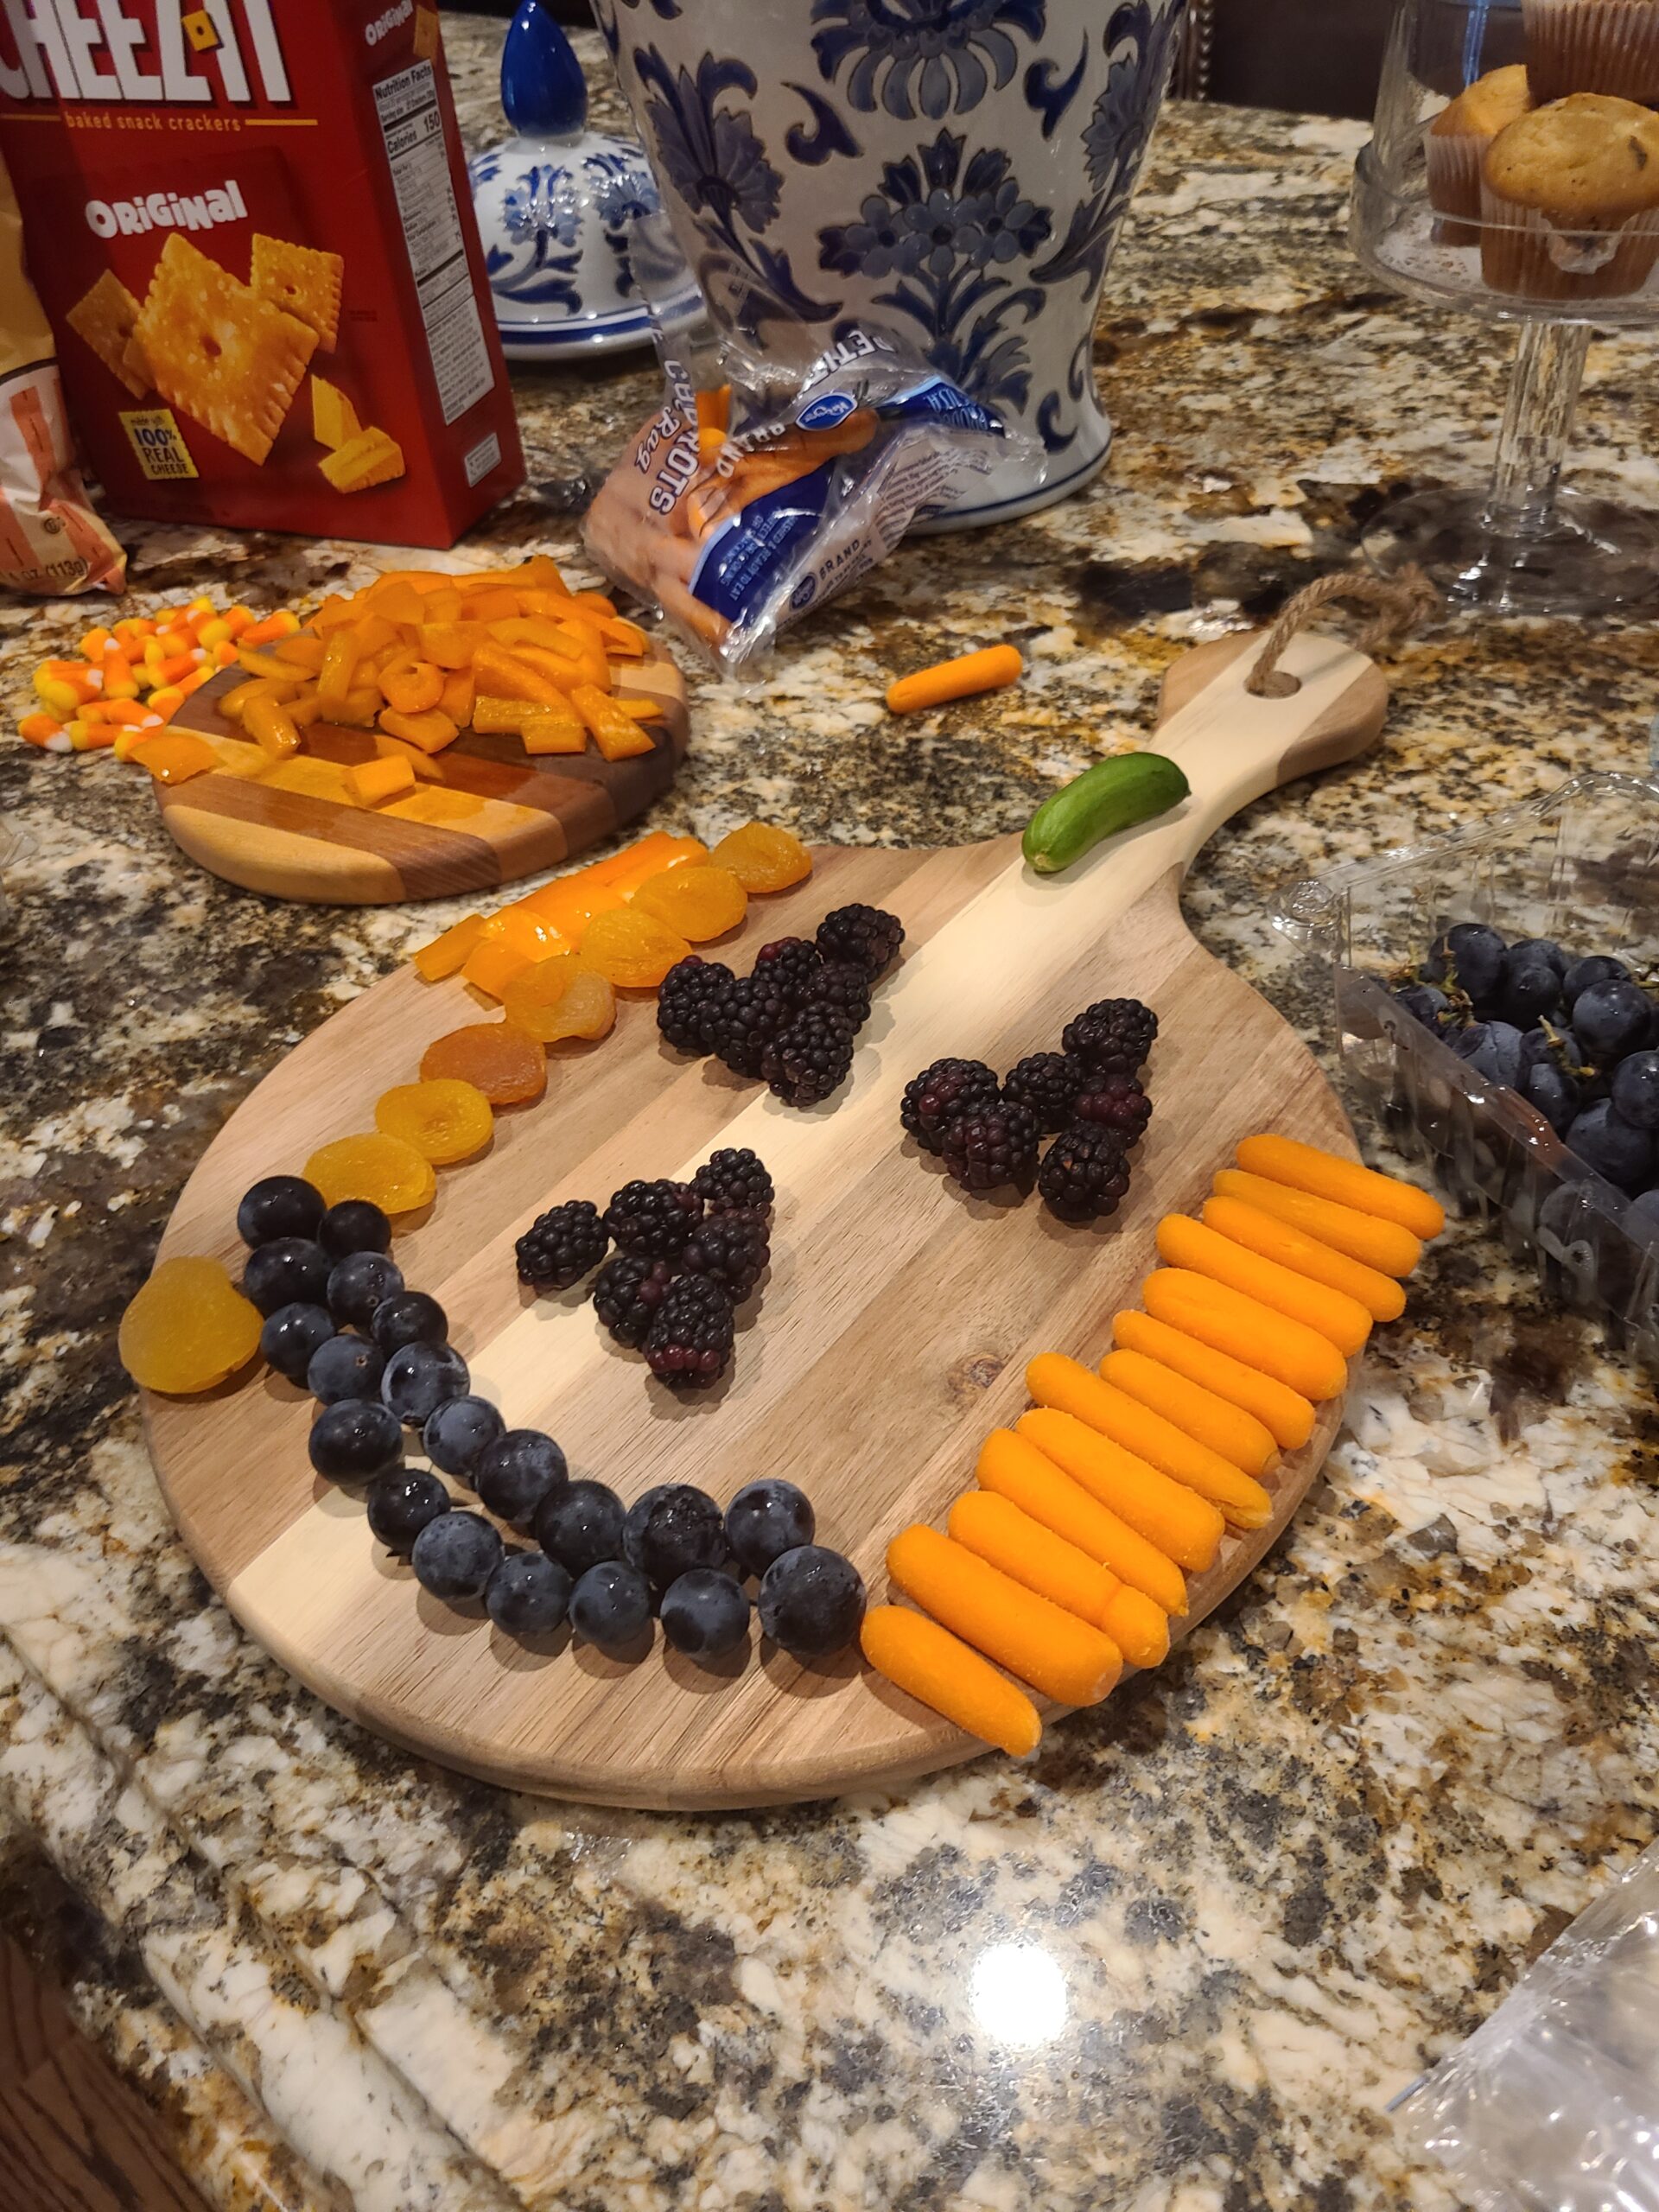
Once all the snacks are ready it is time to transform your canvas into an incredible pumpkin. I recommend starting with the stem, eyes and mouth. Doing this will ensure the jack-o’-lantern’s face is centered. After you place the stem, eyes and mouth, you can start putting all the goodies and treats on the board.
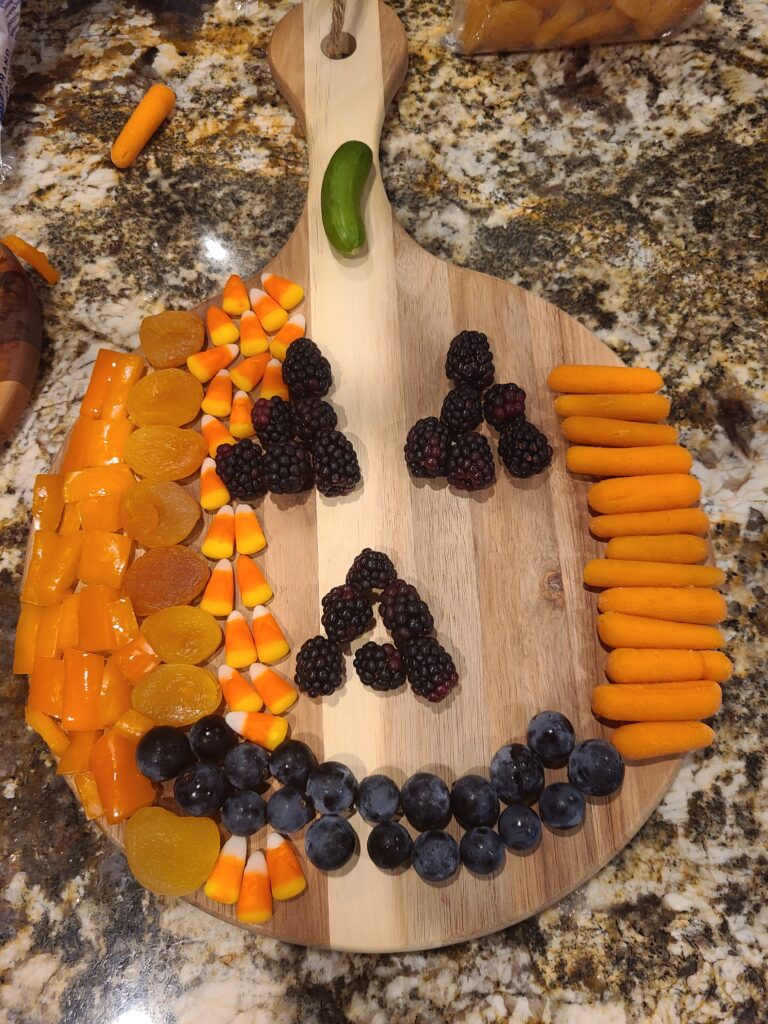
We used the eyes and mouth as anchors and placed orange snacks around them in a vertical pattern. There is no wrong way to do this, you are the designer. You can create a pattern by assembling the treats horizontally, vertically, diagonally or mismatched. Do what speaks to you and have fun with it.
*Fourth: Admire and Enjoy: Now that your awesome jack-o’-lantern is complete, it is time to sit back and admire your work. Share this ghoulish masterpiece with loved ones and watch their eyes light up with joy when they gaze upon this amazing creation. Be sure to take pictures before the zombies start snacking! Happy Halloween!
Enjoy!
There is magic in the night when pumpkins glow by moonlight!
P.S. If you are interested in other Halloween or fall themed charcuterie board ideas, check out my other posts – How to Create a Halloween Charcuterie Board and How to Create a Fall Charcuterie Board.